Friday, May 28, 2010

LONG TIME COMING- Big Project = Big Blog Post

In true motherhood obsession, I took on the mother load of all projects. A year ago some friends and I were all talking about getting together to make our kids quiet books for church. We came up with some fun ideas but alas, new babies came and life got pretty busy for all of us.

So for some reason the time had come and I decided to tackle it. I agonized for weeks and weeks about the style of how I wanted it to look. Do I do everything out of felt, do I draw on fabric with fabric markers, do I design each page myself? Then I searched and searches everywhere online that I could to find some ideas, and came up with a few of my own. I will admit that Audrey (at 2.5 years old) is too old for some of the cute ideas out there. I wanted her book to be a little more interactive and challenging in her though process than pages with buttons and lift tabs. She has regular books that do that. Anyway, there is nothing worse than when a project turns out less than mediocre when you put so much effort into it.

So here is how it turned out. I can't believe it turned out so amazingly awesome I must say so myself. I better get a comment from EVERYONE that reads this, to tell me how AMAZING I am for doing this for my daughter and how stinking cute it turned out! HAHAHAHA

My final book pages measure 10 x 11 inches and the cover is 11.5 x 12.5. The pages in these pics are all unfinished but if you see in the final book pages I sewed them inside out and then flipped them and finished them like you would a pillow case.


I used a combination of hand drawn things ( the kites on this page, and clip art with iron on transfer paper) That way I didn't take quite as long as it might have if i had had to cut all those shapes out, and heaven forbid come up with decent art work. The point of this page is matching patterns. I didn't actually do a match for each kite because I like that she has to "search" through some extras to find the matching pattern.


Iron on for the face, and I ended up using tacky glue to put the pieces of yarn in place. Worked like a charm.


I wanted something to help her count. She already knows how to count but this page helps with the added bonus of learning to count one thing at a time. funny how you don't ever think about the "stages" of learning to count.


This is a page she can grow in to. The hands spin


The ark opens like a drawbridge with the animals inside.

Once again a page where her being older and already knowing her animals and sounds attributed to this outcome, Finger puppets. This is probably her favorite page. She loves to have me stick all of these on her tiny little fingers.


Learns to set the table and how to open a belt buckle.


I have seen an apple tree in almost every book out there, but I didn't think there was actually much point to just learning to stick them on! This is a great way to learn your family history early. Unfortunately with 7 kids on the Charles's side, I don't think she will be getting a Graf family tree.

Once again the wonder of iron on made this page so easy and so much better.


So simple but this one turned out super cute. Fun little game thrown in the mix.


Right now I only have the one set of coins to explain the concept of tithing, but later you can add lots more to help learn to count the worth of money.


Pretty self explanatory. I just traced my own shoe.


Pockets for the letters of the alphabet and then an entire page with rows of velcro where for now she can practice her ABC's and eventually spell words of sentences.


Cute page where she can write letters and put them in the mailbox, eventually teaching how to address letters and put a stamp on it


Printed out a wintry scene on iron on and then built all the snowman pieces out of felt, each piece comes off.


I decided to make kind of a zipper folder cover for the whole thing to stay in so that if any of the little pieces fall out, hopefully they don't get lost. Plus I used pretty sturdy iron on interfacing to make it lots more sturdy but still have a pretty soft appeal to be tossed around and things. I was so excited at how cute this cover turned out. I didn't have a pattern, I just kind of dreamed it up in my head. I cut out two layers of fabric about an inch and a half larger than my pages ended up being. I might actually do it more if anyone cares to follow my technique. Then ironed one piece to sturdy interfacing, and then heat bond onto the other piece so that the finished two pieces could eventually be bonded together. I added all the front page accessories and then bonded the front and back of the "folder" together. Then I ran a zipper all the way around the inside of the folder. Then I decided to use bias tape to cover the unfinished edges.


I ended up punching the brad holes into each page to turn it into a "three ring binder". this way you can take each page out or add more pages if you want.

I want to advise also, a SUPER easy way to do some of this stuff is with the heaven sent machine called a CRICUT. My sister in law has one and I knocked out the titles for each page in like a half hour. It was awesome! Saved me lots of cutting. Sanks Cassidy.

NOTES:
-If you are making things that come off the pages strictly out of felt ( like in the tic tac toe game) I would recommend using a thicker interfacing to keep them sturdy. Felt stretches in the hands of curious two years old's.

- I used a thicker interfacing on each page to help it hold it's own and then when sewn together each page (which is actually two thick) is quite sustainable. Some people just use felt alone as the page, or I have seen muslin or straight pellon used. Pretty much up to you and how you want it to feel.

- I spent very little on this project, I only had to buy some interfacing, the cute cover fabric, the zipper (need at least a 36 in) and the iron on paper (which is actually kind of expensive so do a test print, and remember to change your paper setting in your printer or reverse your image.) All other fabric and felt was stuff I had.

- DO NOT re-iron anything with the iron on transfer paper on it. It will stick to whatever is against it. I did that on the clock and the felt from the hands got stuck in the clock face. URG!!


Tuesday, May 4, 2010

Summer Food

Is there anything more divine than real Italian bruschetta with fresh basil and enough garlic to taste it for days?!

I think not! And it's healthy!

Bruschetta with Tomato and Basil

Bruschetta with Tomato and Basil
Print Options

Bruschetta with Tomato and Basil Recipe

INGREDIENTS

  • 6 or 7 ripe plum tomatoes (about 1 1/2 lbs)
  • 2 cloves garlic, minced
  • 1 Tbsp extra virgin olive oil
  • 1 teaspoon balsamic vinegar
  • 6-8 fresh basil leaves, chopped.
  • Salt and freshly ground black pepper to taste
  • 1 baguette French bread or similar Italian bread
  • 1/4 cup olive oil

METHOD

1 Prepare the tomatoes first. Parboil the tomatoes for one minute in boiling water that has just been removed from the burner. Drain. Using a sharp small knife, remove the skins of the tomatoes. (If the tomatoes are too hot, you can protect your finger tips by rubbing them with an ice cube between tomatoes.) Once the tomatoes are peeled, cut them in halves or quarters and remove the seeds and juice from their centers. Also cut out and discard the stem area. Why use plum tomatoes instead of regular tomatoes? The skins are much thicker and there are fewer seeds and less juice.

2 Make sure there is a top rack in place in your oven. Turn on the oven to 450°F to preheat.

3 While the oven is heating, chop up the tomatoes finely. Put tomatoes, garlic, 1 Tbsp extra virgin olive oil, vinegar in a bowl and mix. Add the chopped basil. Add salt and pepper to taste.

4 Slice the baguette on a diagonal about 1/2 inch thick slices. Coat one side of each slice with olive oil using a pastry brush. Place on a cooking sheet, olive oil side down. You will want to toast them in the top rack in your oven, so you may need to do these in batches depending on the size of your oven. Once the oven has reached 450°F, place a tray of bread slices in the oven on the top rack. Toast for 5-6 minutes, until the bread just begins to turn golden brown.

Alternatively, you can toast the bread without coating it in olive oil first. Toast on a griddle for 1 minute on each side. Take a sharp knife and score each slice 3 times. Rub some garlic in the slices and drizzle half a teaspoon of olive oil on each slice. This is the more traditional method of making bruschetta.

5 Align the bread on a serving platter, olive oil side up. Either place the tomato topping in a bowl separately with a spoon for people to serve themselves over the bread, or place some topping on each slice of bread and serve. If you top each slice with the tomatoes, do it right before serving or the bread may get soggy.

Tuesday, April 20, 2010

Recipes


I wanted to share a couple of my favorite recipes for yall!

CINNAMON ROASTED ALMONDS


This is like eating candy without the worry of it being bad for you....almost. It does have sugar in it but I kid you not these things are ADDICTING. Try them, so easy, so yummy

Ingredients

  • 1 egg white
  • 1 teaspoon cold water
  • 4 cups whole almonds
  • 1/2 cup white sugar
  • 1/4 teaspoon salt
  • 1/2 teaspoon ground cinnamon

Directions

  1. Preheat oven to 250 degrees F (120 degrees C). Lightly grease a 10x15 inch jellyroll pan.
  2. Lightly beat the egg white; add water, and beat until frothy but not stiff. Add the nuts, and stir until well coated. Mix the sugar, salt, and cinnamon, and sprinkle over the nuts. Toss to coat, and spread evenly on the prepared pan.
  3. Bake for 1 hour in the preheated oven, stirring occasionally, until golden. Allow to cool, then store nuts in airtight containers.


AMISH WHITE BREAD

This is the most amazing bread EVER! It is so good. Especially if you use bread flour. This one SAVED me when I was on no dairy. I would roll it out into a long roll and sprinkle cinnamon and sugar on it and it makes the most amazing cinnamon bread. Pretty easy one too.

  • 2 cups warm water (110 degrees F/45 degrees C)
  • 2/3 cup white sugar
  • 1 1/2 tablespoons active dry yeast
  • 1 1/2 teaspoons salt
  • 1/4 cup vegetable oil
  • 6 cups bread flour

Directions

  1. In a large bowl, dissolve the sugar in warm water, and then stir in yeast. Allow to proof until yeast resembles a creamy foam.
  2. Mix salt and oil into the yeast. Mix in flour one cup at a time. Knead dough on a lightly floured surface until smooth. Place in a well oiled bowl, and turn dough to coat. Cover with a damp cloth. Allow to rise until doubled in bulk, about 1 hour.
  3. Punch dough down. Knead for a few minutes, and divide in half. Shape into loaves, and place into two well oiled 9x5 inch loaf pans. Allow to rise for 30 minutes, or until dough has risen 1 inch above pans.
  4. Bake at 350 degrees F (175 degrees C) for 30 minutes.


BALSAMIC-GLAZED SALMON FILLETS
Balsamic-Glazed Salmon Fillets

I have been wanting to try new fish recipes to see if we can work it into our routine meals more. Charles of course still wouldn't touch it but I LOVED this. It was so good. I doubled the sauce and used it as a little drizzle over brown rice. SO yummy.

  • 6 (5 ounce) salmon fillets
  • 4 cloves garlic, minced
  • 1 tablespoon white wine
  • 1 tablespoon honey
  • 1/3 cup balsamic vinegar
  • 4 teaspoons Dijon mustard
  • salt and pepper to taste
  • 1 tablespoon chopped fresh oregano

Directions

  1. Preheat oven to 400 degrees F (200 degrees C). Line a baking sheet with aluminum foil, and spray with non-stick cooking spray.
  2. Coat a small saucepan with non-stick cooking spray. Over medium heat, cook and stir garlic until soft, about 3 minutes. Mix in white wine, honey, balsamic vinegar, mustard, and salt and pepper. Simmer, uncovered, for about 3 minutes, or until slightly thickened.
  3. Arrange salmon fillets on foil-lined baking sheet. Brush fillets with balsamic glaze, and sprinkle with oregano.
  4. Bake in preheated oven for 10 to 14 minutes, or until flesh flakes easily with a fork. Brush fillets with remaining glaze, and season with salt and pepper. Use a spatula to transfer fillets to serving platter, leaving the skin behind on the foil.


More to come soon...those are just a few off the top of my head.


Sunday, April 18, 2010

A little Love

Just a few seriously cute ones of the love of siblings.


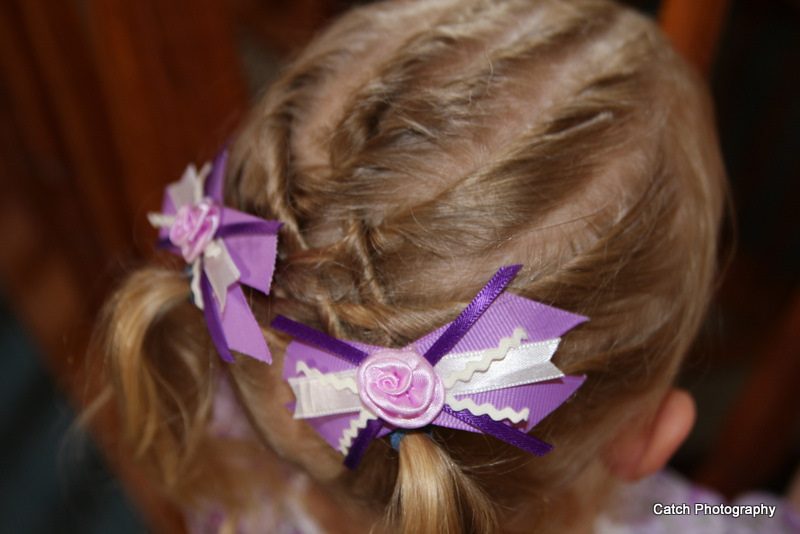
Cute Hairdo


Looked online for a cute idea of something to do with Audrey's hair for church. I found THIS lady with an entire blog devoted to hair ideas!!!! For the love of mother's with little girls.....Here is the outcome


Ethan discovers his toes


Yeah for $3 Goodwill toys


So you don't feel bad when you hate them and want to throw them away!!!

This thing looks like so much fun, and is of course to Audrey. But it is so loud and annoying. I might try to stuff cotton into the speakers or something. Otherwise it might have to go to a nice, warm, caring home....any takers?


Little homeless girl


This is what I found Audrey doing one day. She packed all her earthly possessions into that laundry basket. Maybe she thought the world was ending and she needed to get it all together. Who knows

Easter

Easter was a nice time this year. We got to listen at home with just our little family to conference. I made us a nice breakfast to eat all together and then on to Lambs later for dinner and Easter egg hunt. So fun. Audrey liked opening all her easter things, and Ethan's too after all since he couldn't 'open' them.


I must be a true housewife to let myself be not only photographed without makeup, but then put it up for everyone to see.

I made the kids 'I spy' bags this year. Audrey got a duck and Ethan got a fish. They turned out cute. I got a few other little dollar section things. Audrey however to this day still refuses to actually wear this dress. I am not sure why. She never has an opinion about what she wears.


One of those moments that is super cute, but just didn't quite get captured on camera, because this is not a very cute picture.


Stanley Easter Party 2010


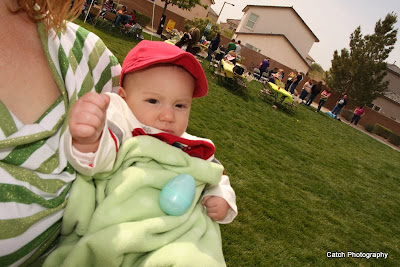
We always get to invade the Stanley (my sister-in-law's, inlaws) family gathering for Easter. They have a big thing in the park every year and it is a lot of fun, despite not knowing very many of them closely, we see them every year at this party and it is a lot of fun.


My cute boy given me the smile

There was no messing around this year. She went right for the eggs and filled up her whole basket so fast.


And then went straight to work.

And this is what she wanted to be doing the rest of the time. I guess I count myself lucky that she actually ate a hot dog. That probably a little better than straight candy right?


Audrey took a two second break from the candy to responsibly hold her brother and at least look in my direction!


Love this face....Running to get some bubbles.


Ethan and his cousin Jacob that is about 5 weeks his elder.


And his smoking hot mom my sister in law Cassidy.


Nathan Connelly teaching Audrey to catch a football.